

APIs play a critical role in application connectivity, but they are also vulnerable to attacks. In the past, with monolithic apps, there was only one entry point to secure. In microservices architectures, a single app often consists of many microservices connected via APIs, and each of those APIs could have hundreds of endpoints. This makes the potential attack surface for APIs huge, with every new API creating an entry point in your security perimeter.
There are many strategies to secure your APIs. One of the most fundamental is access control. Simply put, you must verify the user’s identity (authentication, or AuthN) and confirm that they can access certain resources (authorization, or AuthZ). Implementing OpenID Connect (OIDC) is one of the most common access control approaches used for APIs. You can get it up and running in minutes with API Connectivity Manager, part of F5 NGINX Management Suite.
In this tutorial, you’ll learn how to perform the authorization portion of the OIDC workflow by setting up JSON Web Token (JWT) validation with API Connectivity Manager and Azure Active Directory (Azure AD).
What is OpenID Connect?
OpenID Connect (OIDC) is an identity protocol built on top of the OAuth 2.0 protocol. OIDC allows clients to verify the identity of the end user or device. This is one part of access control, which includes both authentication and authorization:
- Authentication verifies a user or device is who they claim to be
- Authorization determines what a verified user or device can access
There are many different implementations of OIDC, including Azure AD, which you’ll use in this tutorial. Alternatively, you can use other OIDC solutions – such as F5 BIG-IP Access Policy Manager (APM), Okta, Auth0, Ping Identity, and more – with API Connectivity Manager.
What You Need to Get Started
Make sure you have the following perquisites:
- API Connectivity Manager installed and configured in your environment
- An active Microsoft Azure account
- A REST Client (Postman is used in this tutorial)
You can sign up for your 30-day free trial of NGINX Management Suite if you need access to API Connectivity Manager.
Create an Azure AD Application
Open a browser and log in to your Azure Portal.
Click on App registrations in the left-hand menu.
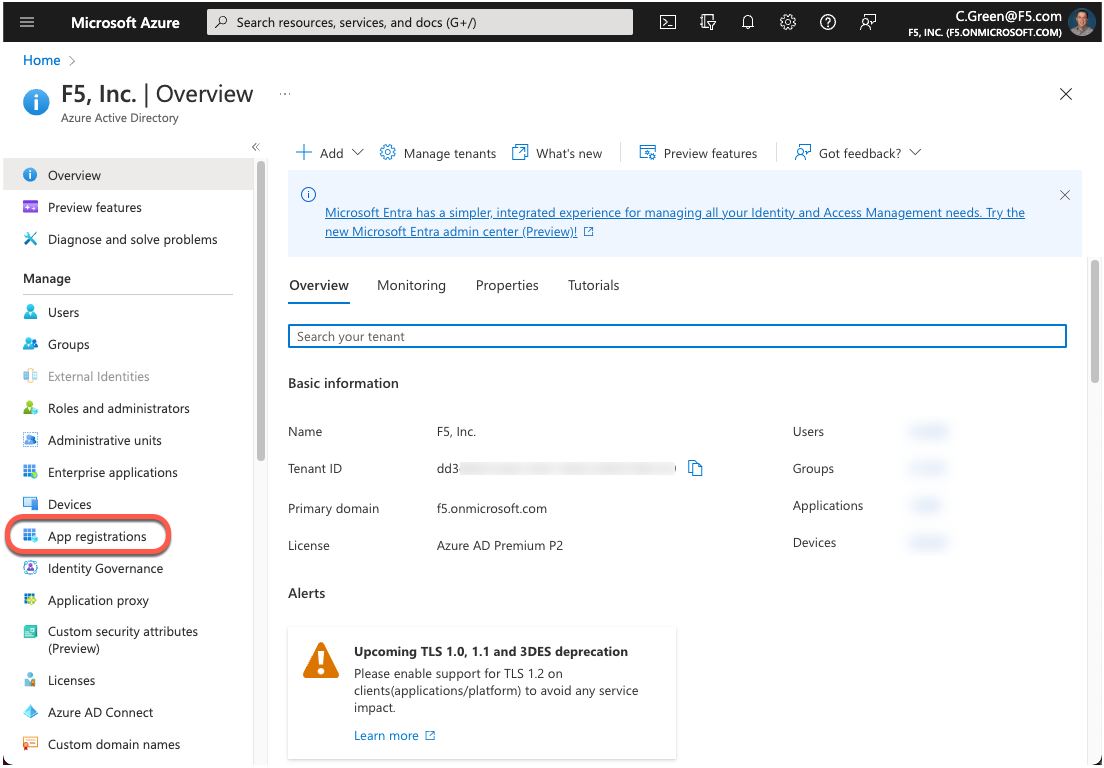
Figure 1: Azure AD Portal Home Page
Click on the New registration button.
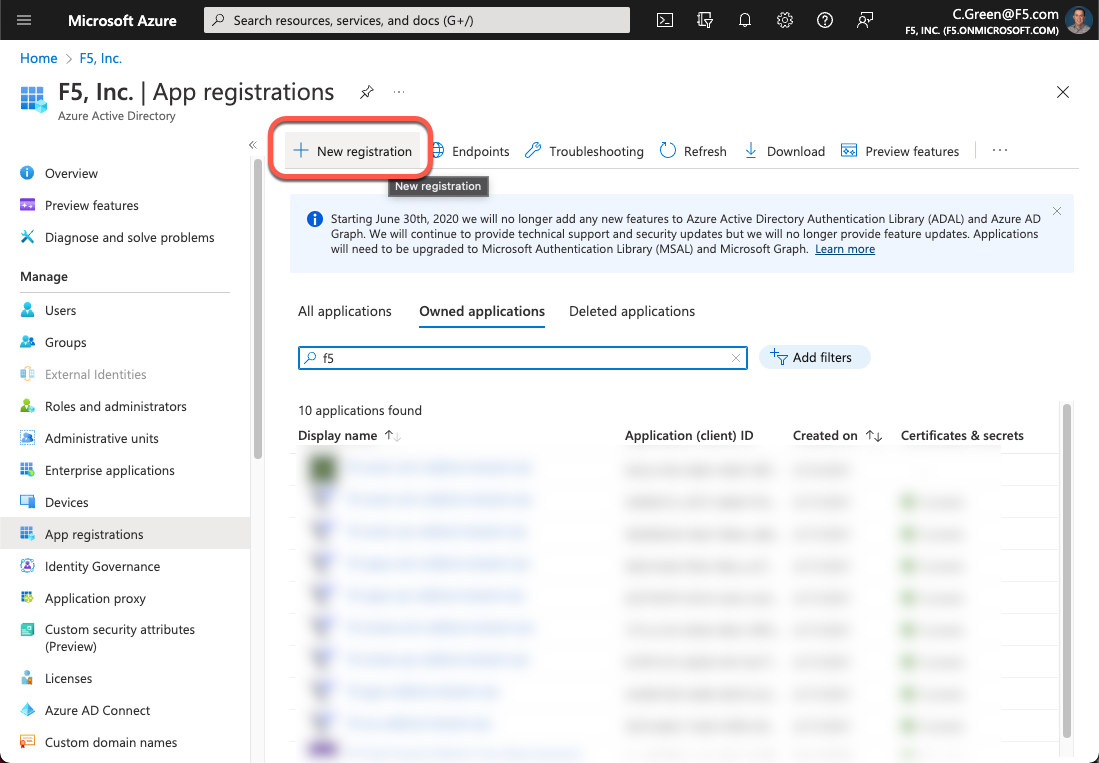
Figure 2: Azure AD App Registration
To create a new application, supply a name, redirect URI and click the Register button. In this demo, you will leverage Postman, so you will use the Postman OIDC redirect URI.
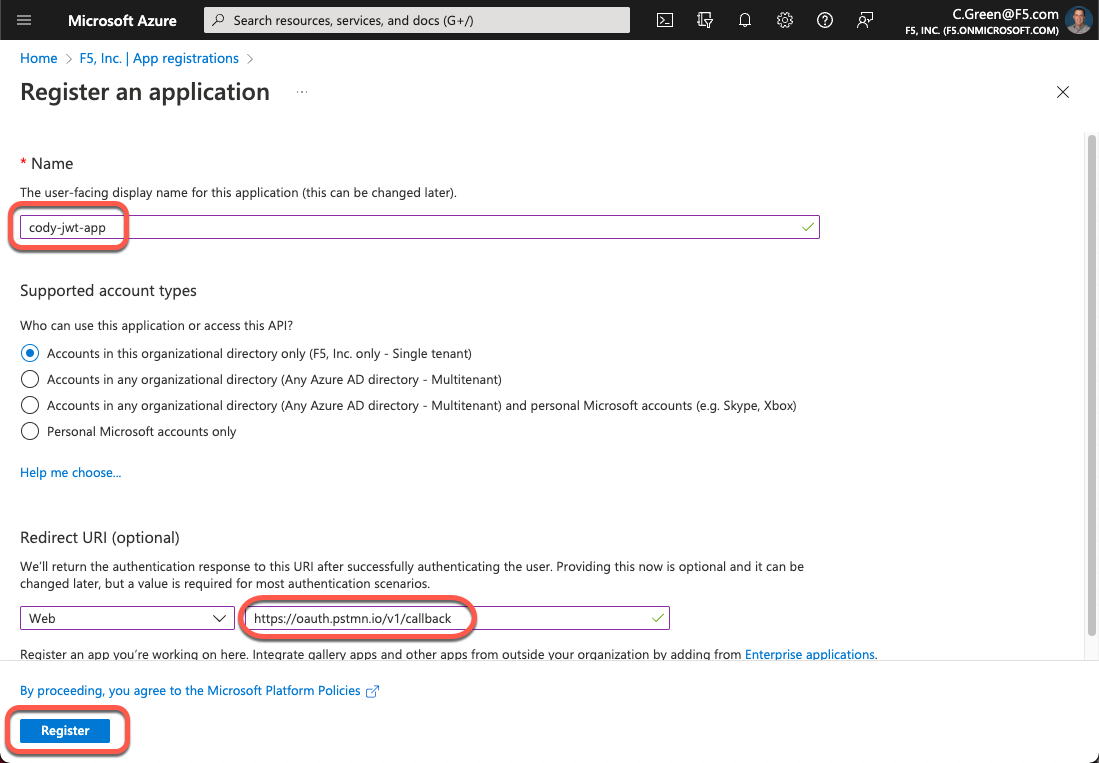
Figure 3: Create a New Azure AD App
Now that your app is created, you need to create OAuth scopes to provide access to the API. Click on the Expose an API link in the left-hand menu.
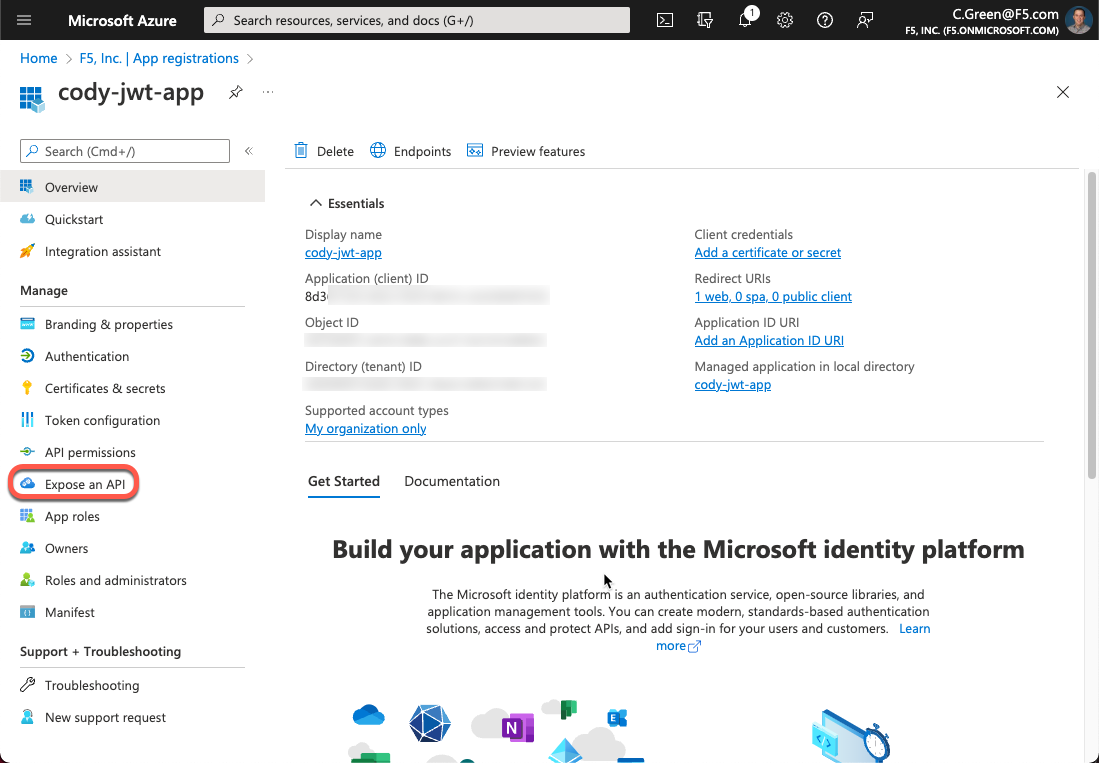
Figure 4: Expose an API
Click Add a scope.
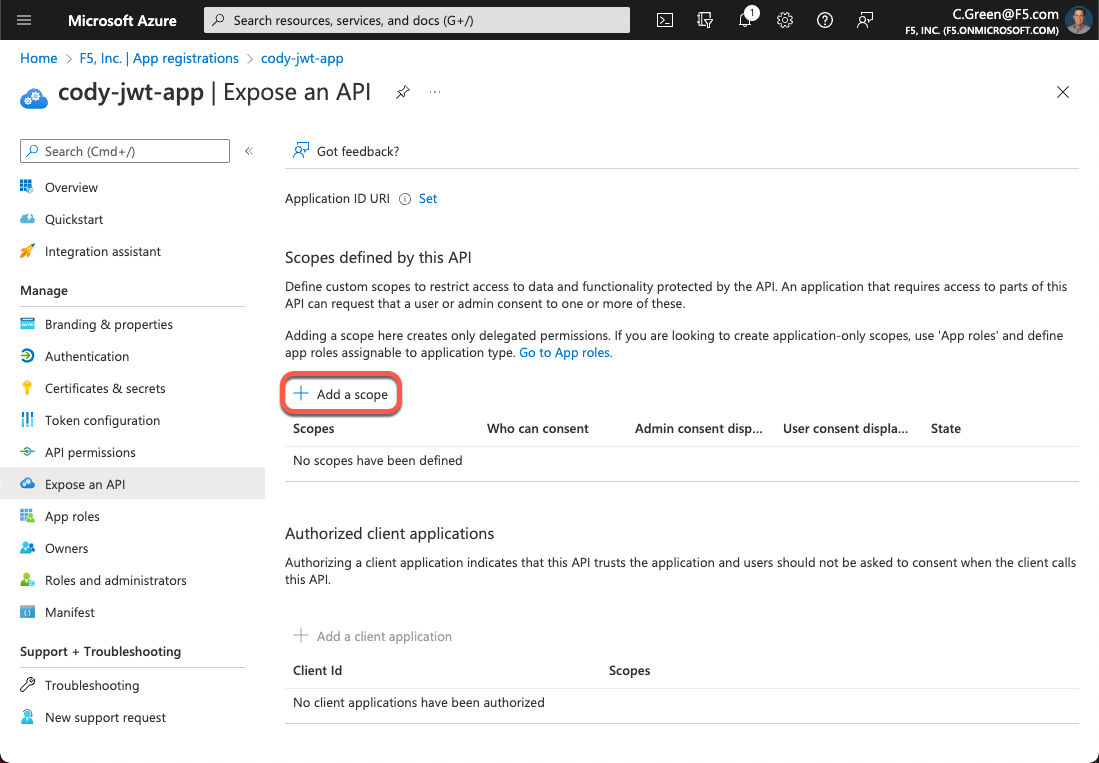
Figure 5: Add a Scope
Accept the default Application ID URI or create your own and click the Saveand continue button. If you want to create your own Application ID URI, you must register your desired domain with Azure AD.
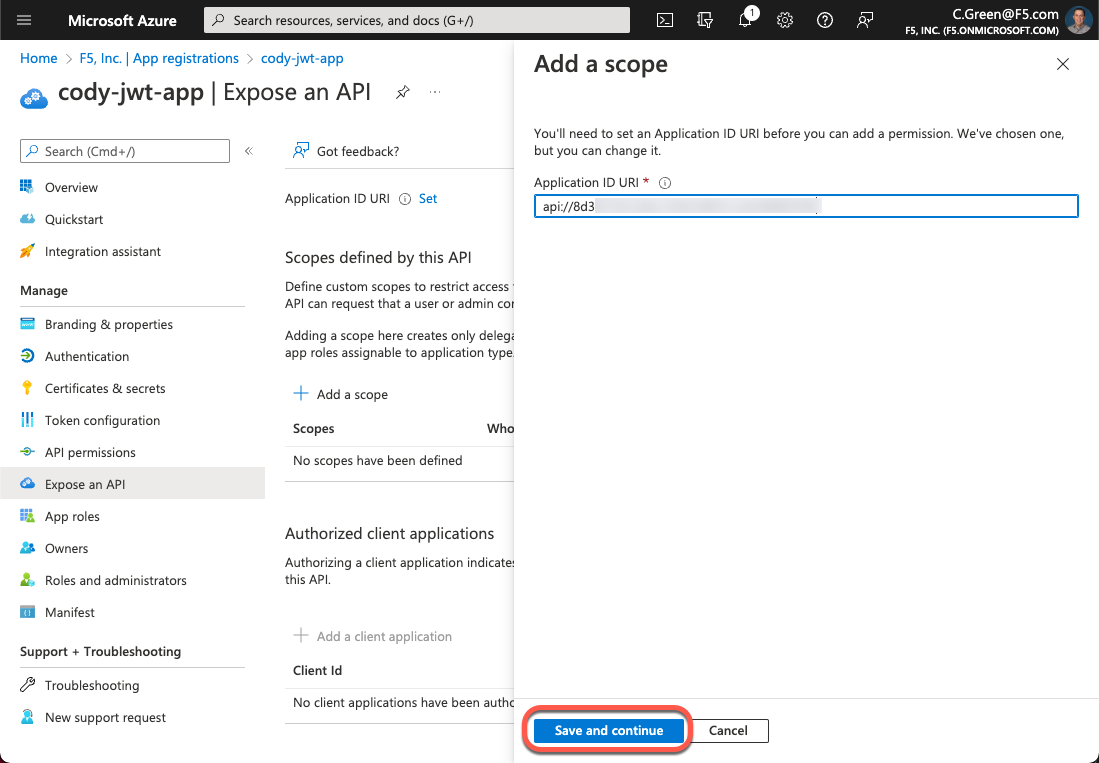
Figure 6: Application ID URL
For this demo, your scope is based on a Microsoft example. Fill out the form with the following information then click the Add scope button:
Scope name: Employees.Read.All
Who can content?: Admins and users
Admin consent display name: Read-only access to Employee records
Admin consent description: Allow read-only access to all Employee data.
User consent display name: Read-only access to your Employee records
User consent description: Allow read-only access to your Employee data.
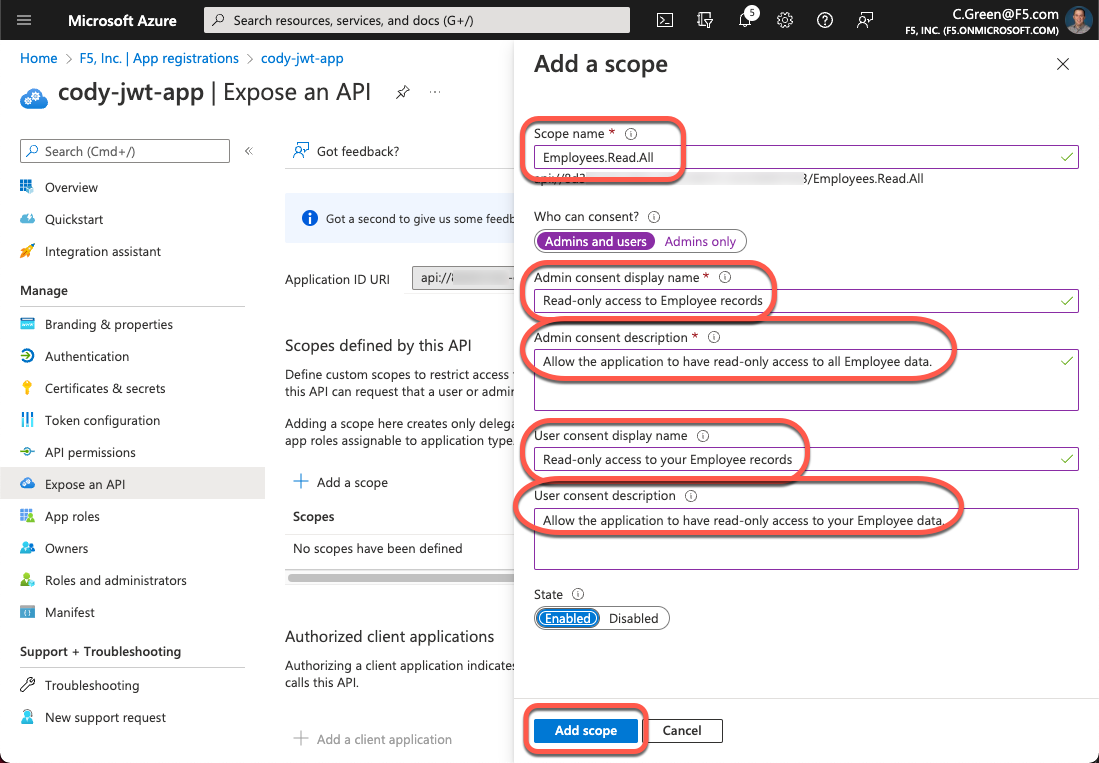
Figure 7: Add a Scope
Next, you need to authorize the client application. To do this, grab the Client ID. Click the Overview link in the left-hand menu and copy the Application (client) ID.

Figure 8: Application Client ID
Click on the Expose an API link again, then click the Add a client application button.
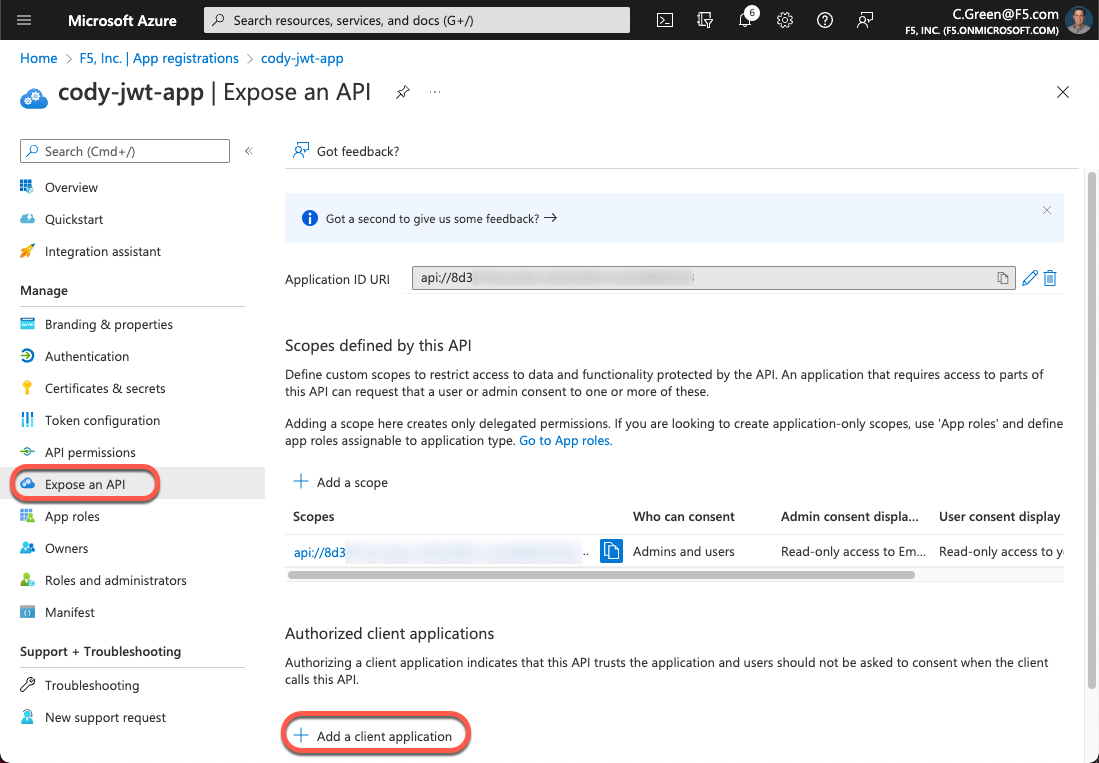
Figure 9: Add a Client Application
Paste the Application Client ID in the Client ID field and select the checkbox next to your Application ID URI. Then, click the Add application button.
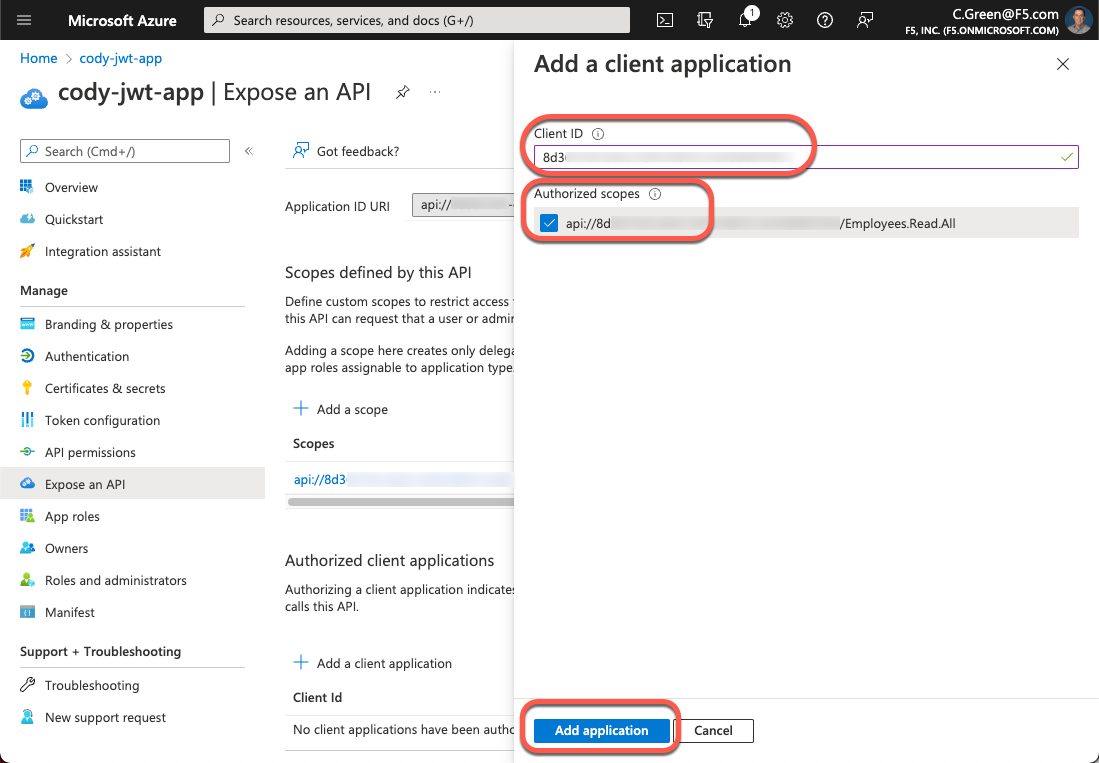
Figure 10: Add a Client Application
Next, for this demo, you will leverage an authorization code with PKCE OAuth grant type, so a client secret will be needed for Postman. Click on the Certificates & secrets link in the left-hand menu, then click the New client secret button.
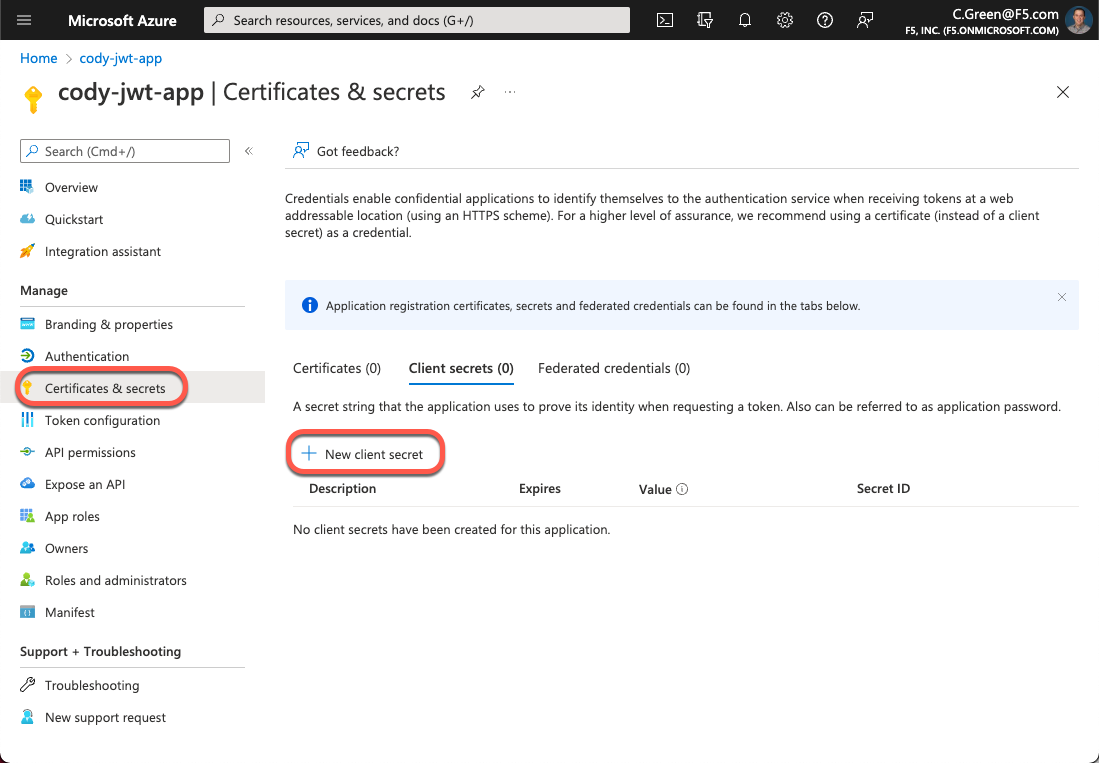
Figure 11: New Client Secret
Name your secret and leave the default expiration time.
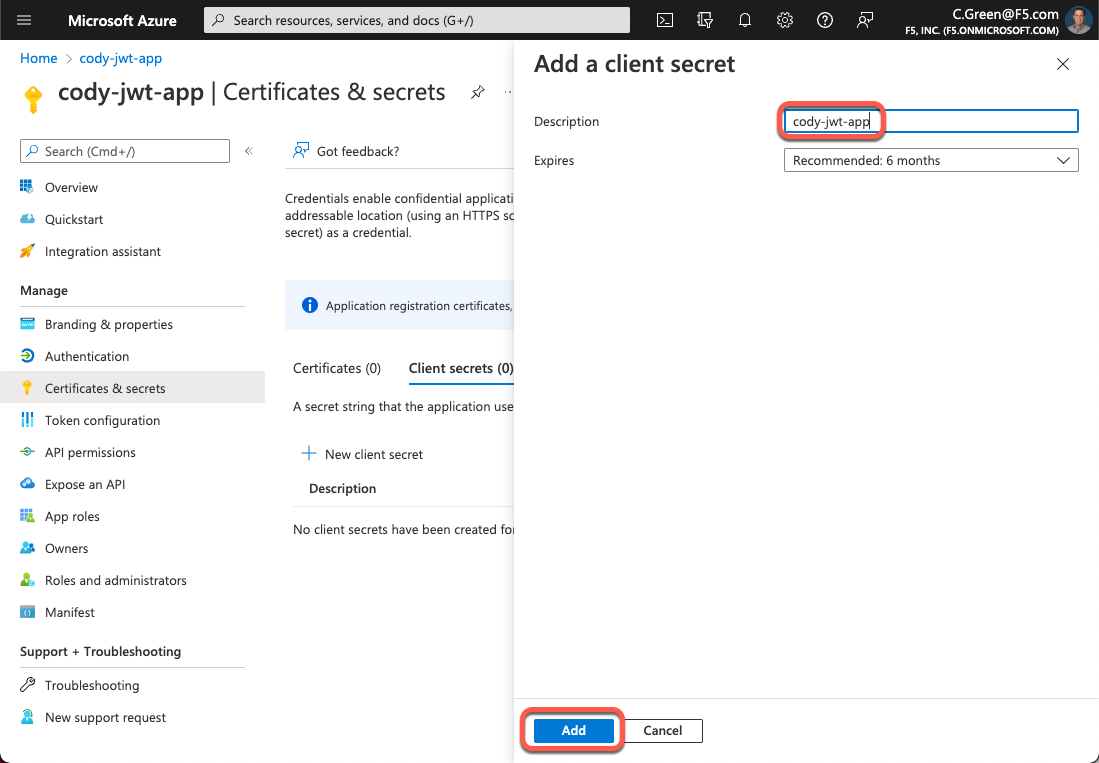
Figure 12: Secret Name
Next, copy your client secret and store it in a password vault so you can use it later.
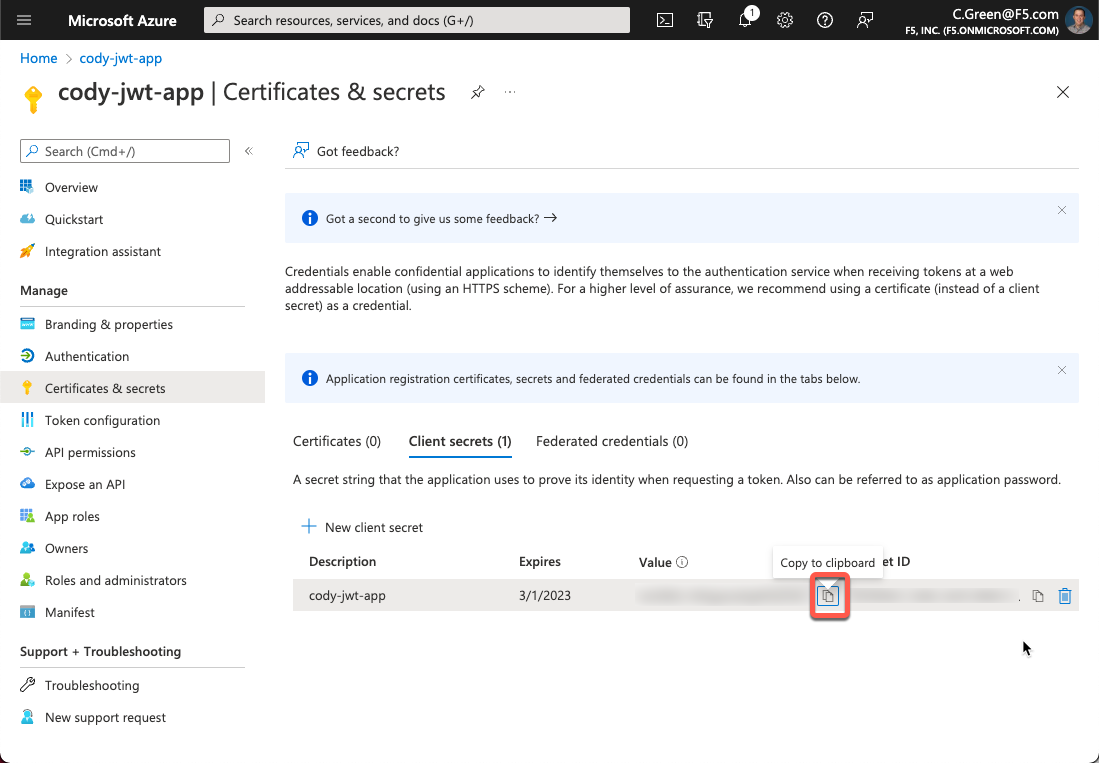
Figure 13: Client Secret
Configure JWT Assertion in API Connectivity Manager
Now that you have your Azure AD application configured, you can set up the API gateway cluster in API Connectivity Manager to perform JSON Web Token Assertion for your defined service. For this step, you’ll need to determine the URI for your Azure AD tenant’s JSON Web Key (JWK) Sets.
You can obtain your JWKS URI from the Azure AD tenant’s well-known endpoint:
https://login.microsoftonline.com/<tenant-id>/v2.0/.well-known/openid-configuration
This page will provide a JSON payload that contains the jwks_uri key. You will need to copy its value.
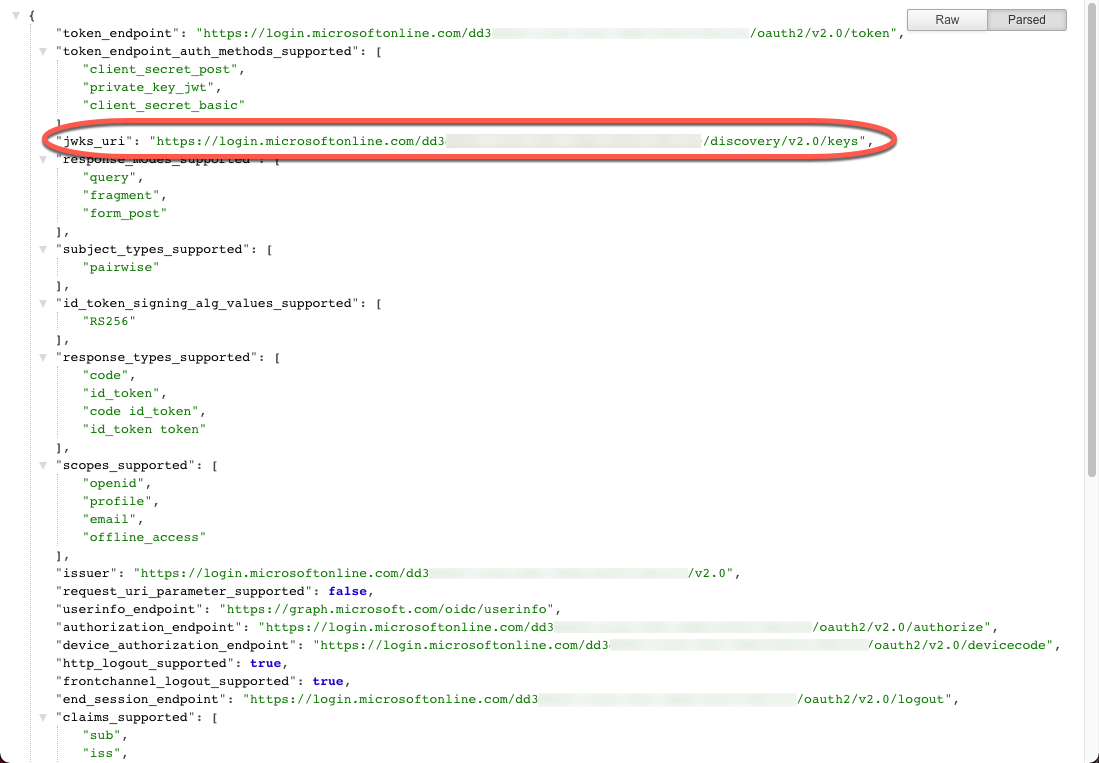
Figure 14: Azure AD Tenant Well-Known Endpoint
Now that you have your JWKS URI, open your API Connectivity Manager console and navigate to your service proxy’s configuration. Click Add Policy for the JSON Web Token Assertion policy.
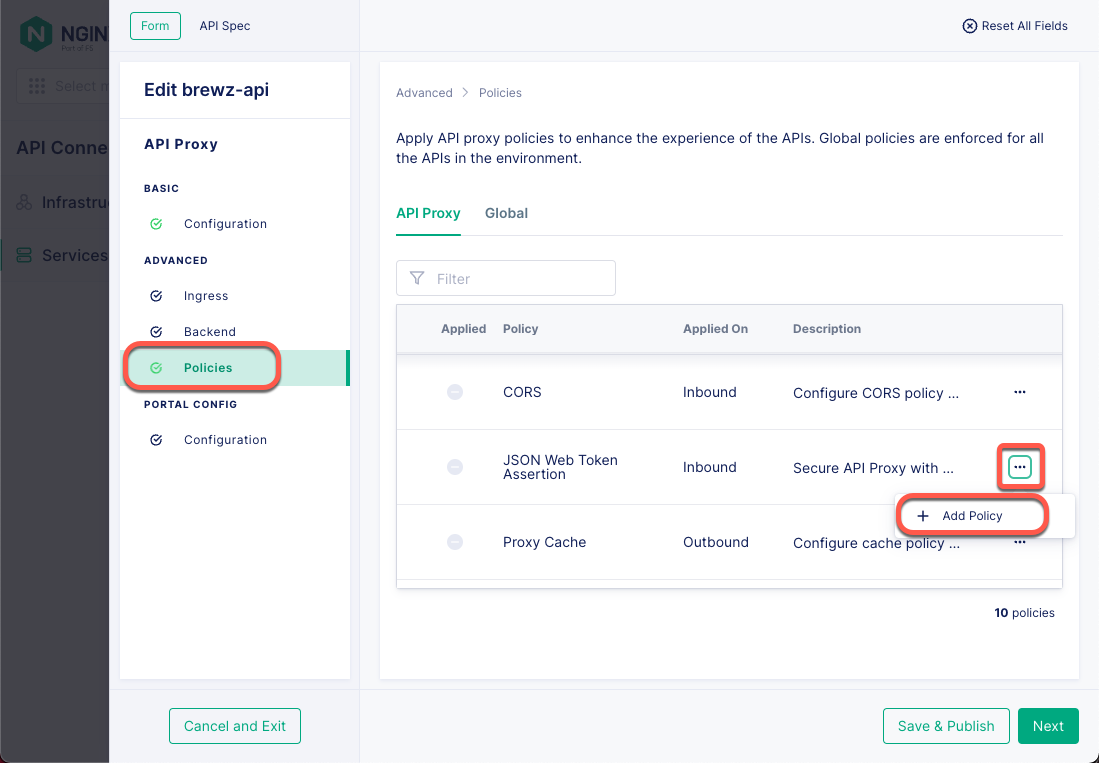
Figure 15: Gateway Service Proxy Policies
Next, paste your Azure AD Tenant’s JKWS URI in the URI Location field , then click the Add button.
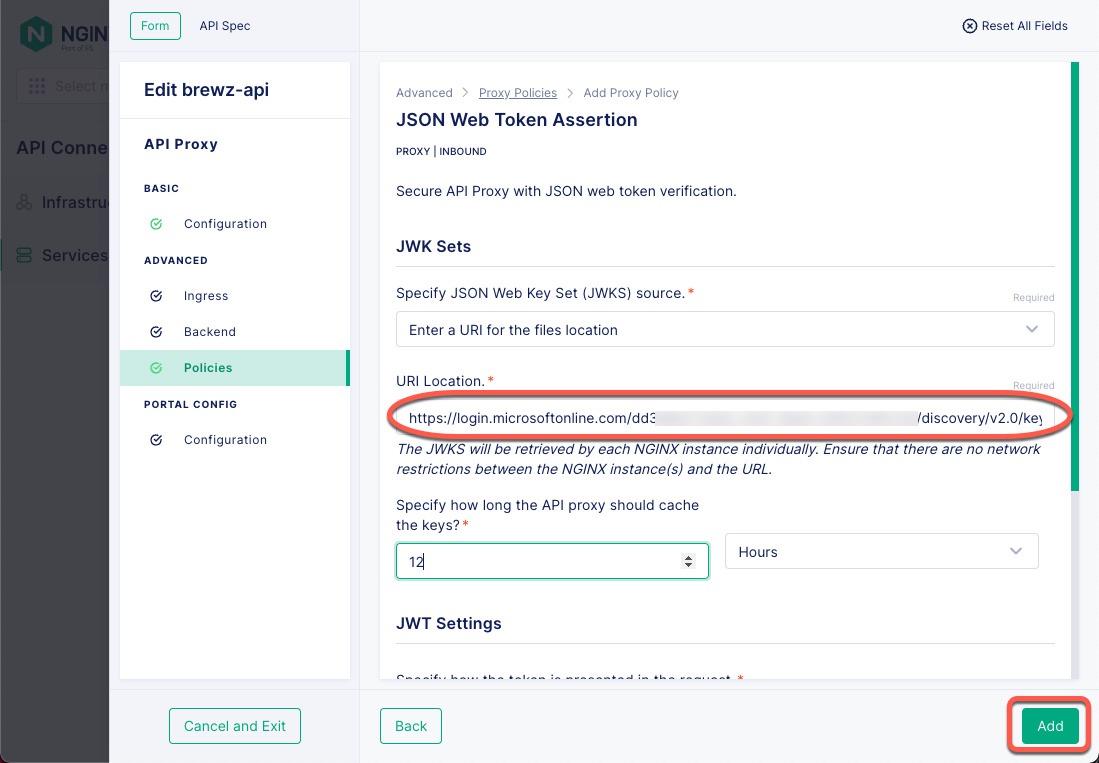
Figure 16: JSON Web Token Assertion Policy
Click the Save & Publish button to push this policy out to your API gateway cluster.
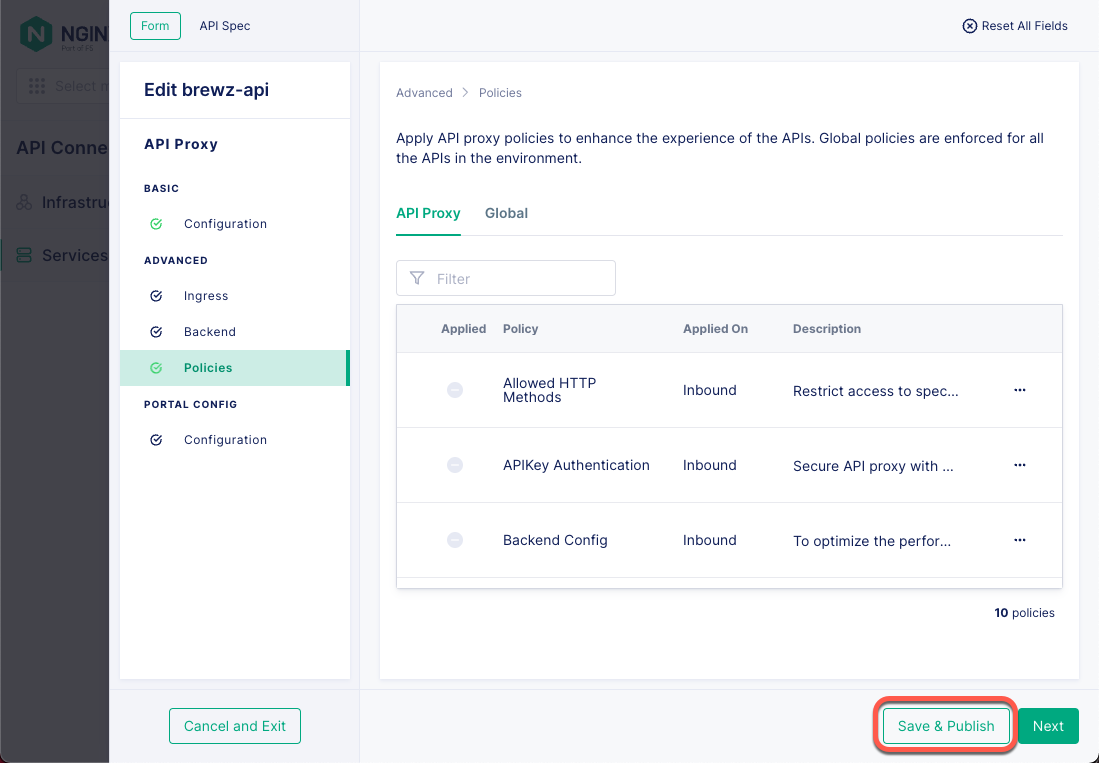
Figure 17: Service Gateway Policy
That’s it! Your API Connectivity Manager instance is now configured to perform JWT Assertion on the configured service gateway.
Testing with Postman
Now, it’s time to test your setup and ensure it behaves as expected. To get started, there are a few things you will need to get from your Azure AD Application:
- Application client secret (you saved this earlier)
- OAuth scope
- OAuth authorization endpoint
- OAuth token endpoint
To get the OAuth scope, open your Azure portal and navigate back to your app registration page. Next, click on the Expose an API link in the left-hand menu and click the Copy symbol for your scope. Save this value so you can use it in a few minutes.
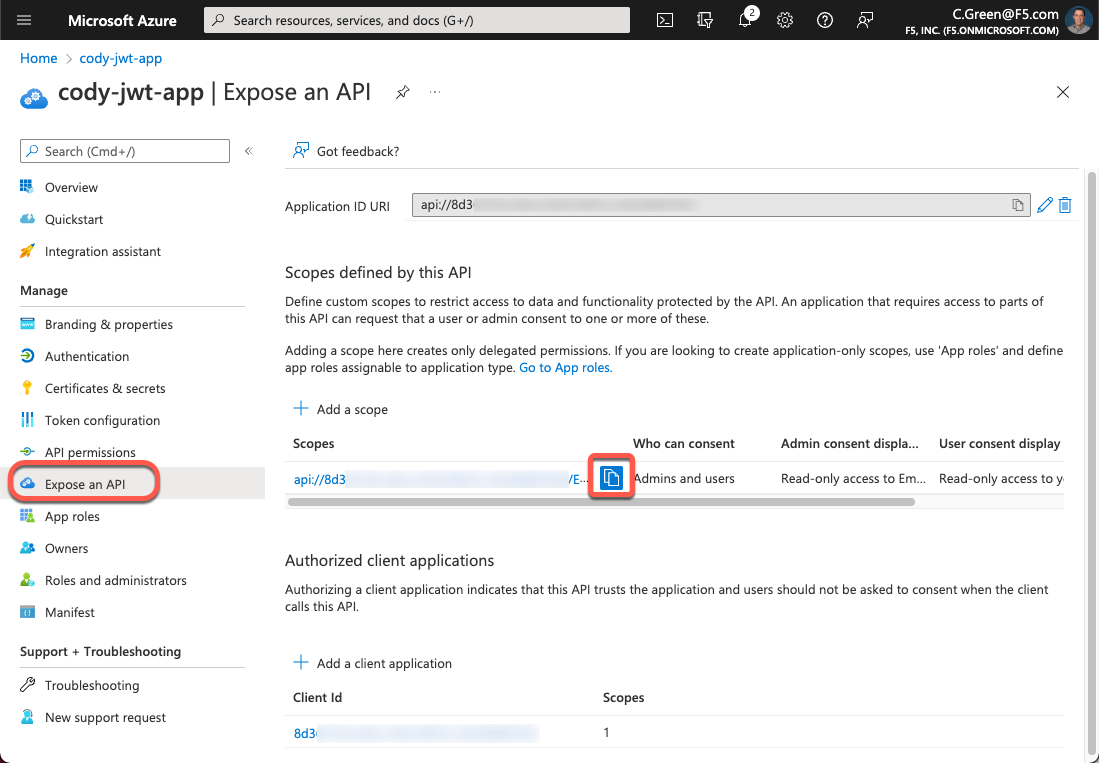
Figure 18: API Scopes
To obtain the OAuth authorization and token endpoints, click the Overview link in the left-hand menu and then click the Endpoints button. After that, copy the authorization and token endpoint URIs.

Figure 19: Azure AD Application Endpoints
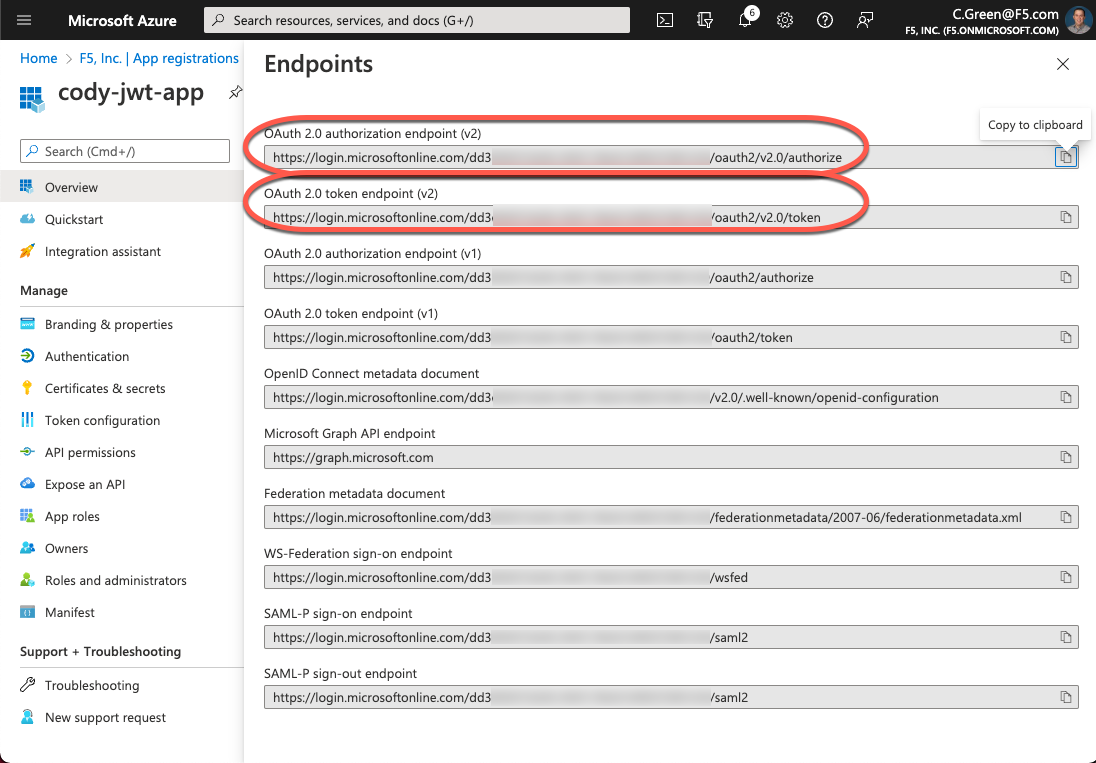
Figure 20: Azure AD Application Endpoint URLs
Open Postman and click on the Environments menu. Then, click the Create Environment link.
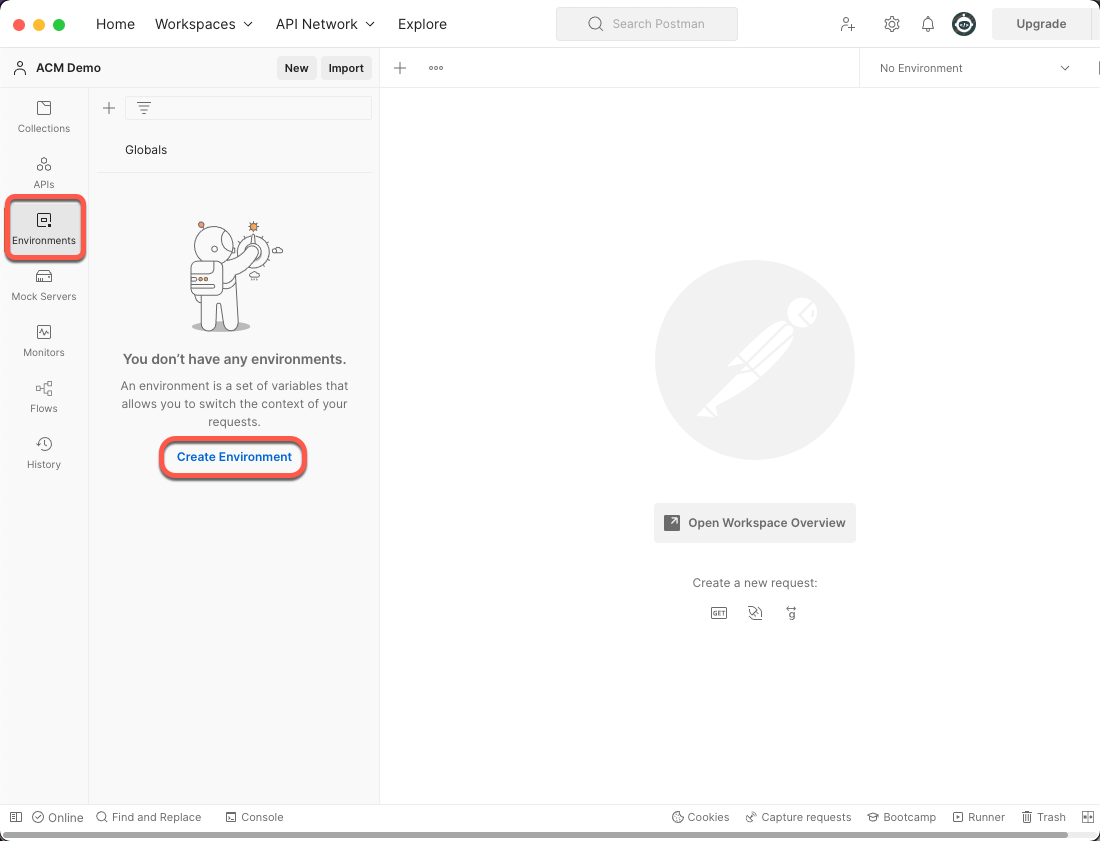
Figure 21: Postman Create Environment
Name your environment and add six variables with the values (saved from previous steps) into the Initial Value column and the Current Value column, then click the Save button.
- client_id: Azure AD Application’s client ID
- client_secret: Azure AD Application’s client secret
- auth_url: Azure AD Tenant’s OAuth Authorization URL
- token_url: Azure AD Tenant’s OAuth Token URL
- tenant_id: Azure AD Directory (tenant) ID
- scope: Azure AD Application’s API scope with Application ID URL
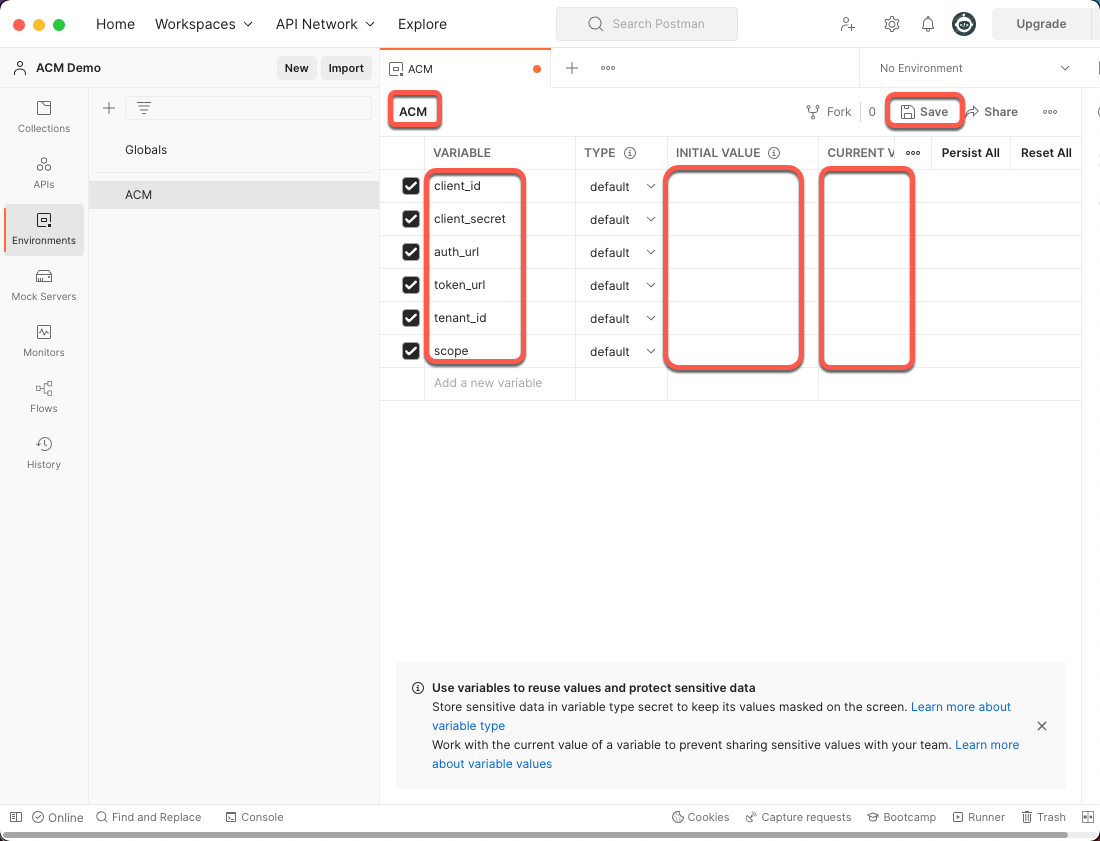
Figure 22: Postman Environment Variables
Open a new tab in Postman and follow these steps:
- Change your Environment to ACM in the top right
- Add your API URL to the address bar
- Click the Auth tab
- Change the Type to OAuth 2.0
- Scroll down in the Auth configuration and set the following variables:
- Auth URL: {{auth_url}}
- Access Token URL: {{token_url}}
- Client ID: {{client_id}}
- Client Secret: {{client_secret}}
- Click the Get New Access Token button

Figure 23: Postman Request
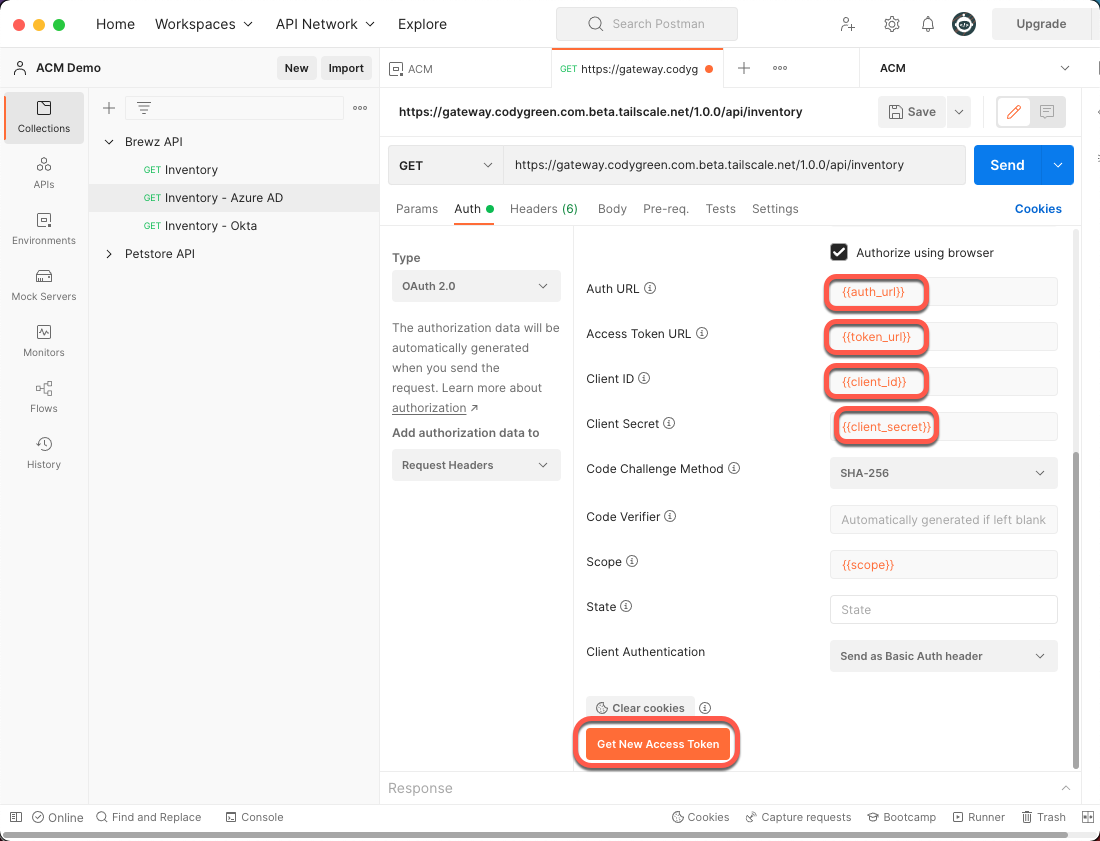
Figure 24: Postman Auth Configuration
A browser window will open, and you will be prompted to log in with your Azure AD credentials. Once you have successfully authenticated, you will be redirected back to Postman, and the following window will appear. Click the Use Token button.
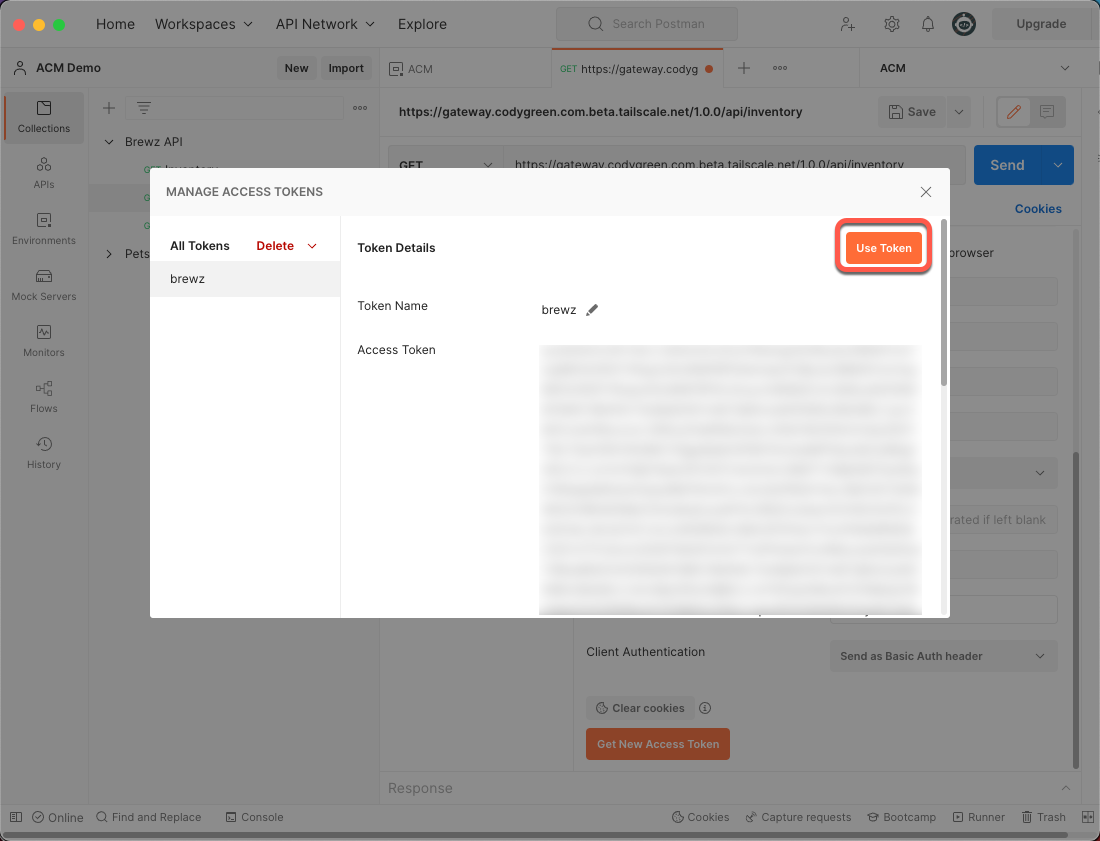
Figure 25: Postman Use Token
Now that you have your OAuth access token, you can finally make your API call. Click the Save button and then click the Send button.
If everything is configured correctly, you should see a 200 OK response.
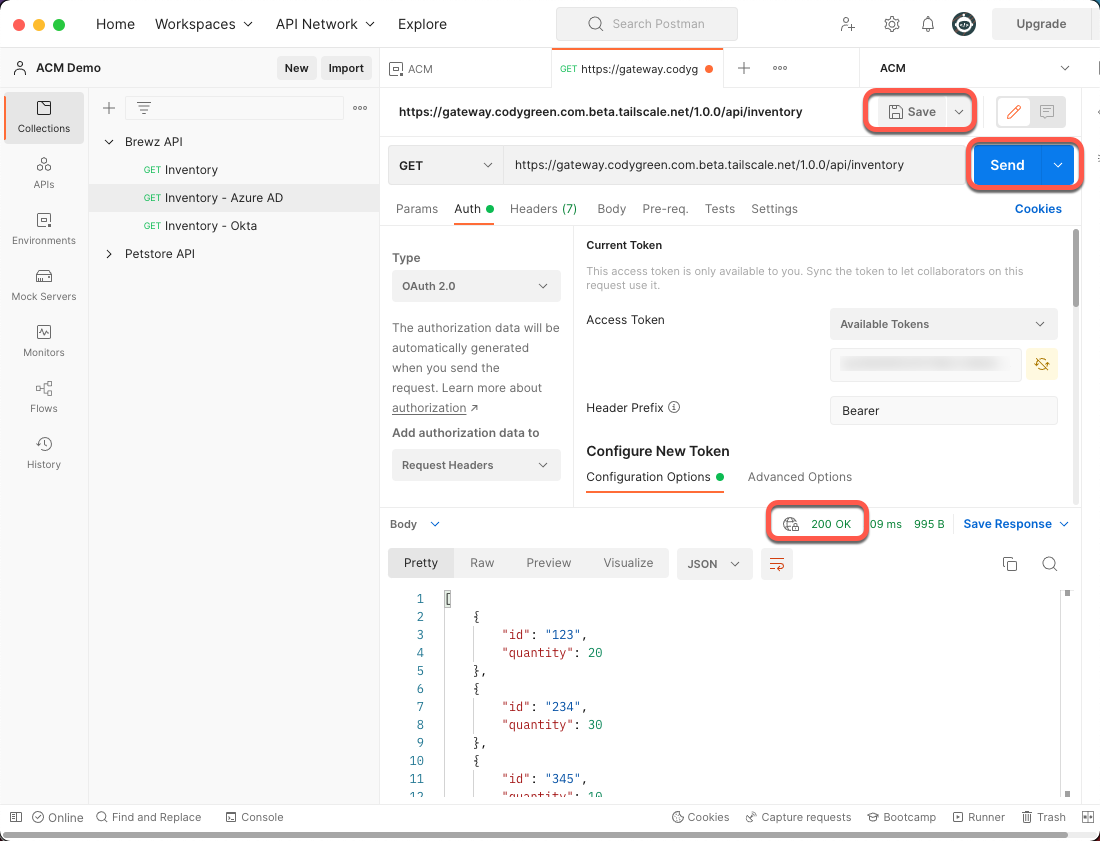
Figure 26: Postman Successful Request
Conclusion
You now have API Connectivity Manager protecting your APIs using Azure AD OAuth Access tokens. The next steps would be to add additional OAuth scopes and configure the API gateway cluster in API Connectivity Manager to pass those scopes to your protected APIs – but that’s a topic for another post!
Get Started Today
Start a 30-day free trial of NGINX Management Suite, which includes API Connectivity Manager and Instance Manager.
A version of this post first appeared on codygreen.com. It is edited and reprinted here with permission from the author.